토큰 주기 설정
https://django-rest-framework-simplejwt.readthedocs.io/en/latest/settings.html
(settings.py)
배포할 때는 access 토큰 평균 5~30분 정도
from datetime import timedelta

SIMPLE_JWT = {
    "ACCESS_TOKEN_LIFETIME": timedelta(minutes=100),
    "REFRESH_TOKEN_LIFETIME": timedelta(days=1),
    "ROTATE_REFRESH_TOKENS": False,
    "BLACKLIST_AFTER_ROTATION": False,
    "UPDATE_LAST_LOGIN": False,

    "ALGORITHM": "HS256",
    "SIGNING_KEY": SECRET_KEY,
    "VERIFYING_KEY": "",
    "AUDIENCE": None,
    "ISSUER": None,
    "JSON_ENCODER": None,
    "JWK_URL": None,
    "LEEWAY": 0,

    "AUTH_HEADER_TYPES": ("Bearer",),
    "AUTH_HEADER_NAME": "HTTP_AUTHORIZATION",
    "USER_ID_FIELD": "id",
    "USER_ID_CLAIM": "user_id",
    "USER_AUTHENTICATION_RULE": "rest_framework_simplejwt.authentication.default_user_authentication_rule",

    "AUTH_TOKEN_CLASSES": ("rest_framework_simplejwt.tokens.AccessToken",),
    "TOKEN_TYPE_CLAIM": "token_type",
    "TOKEN_USER_CLASS": "rest_framework_simplejwt.models.TokenUser",

    "JTI_CLAIM": "jti",

    "SLIDING_TOKEN_REFRESH_EXP_CLAIM": "refresh_exp",
    "SLIDING_TOKEN_LIFETIME": timedelta(minutes=5),
    "SLIDING_TOKEN_REFRESH_LIFETIME": timedelta(days=1),

    "TOKEN_OBTAIN_SERIALIZER": "rest_framework_simplejwt.serializers.TokenObtainPairSerializer",
    "TOKEN_REFRESH_SERIALIZER": "rest_framework_simplejwt.serializers.TokenRefreshSerializer",
    "TOKEN_VERIFY_SERIALIZER": "rest_framework_simplejwt.serializers.TokenVerifySerializer",
    "TOKEN_BLACKLIST_SERIALIZER": "rest_framework_simplejwt.serializers.TokenBlacklistSerializer",
    "SLIDING_TOKEN_OBTAIN_SERIALIZER": "rest_framework_simplejwt.serializers.TokenObtainSlidingSerializer",
    "SLIDING_TOKEN_REFRESH_SERIALIZER": "rest_framework_simplejwt.serializers.TokenRefreshSlidingSerializer",
}
permission
(app-views.py)
from rest_framework import permissions

class MockView(APIView):
    #로그인 확인
    permission_classes = [permissions.IsAuthenticated]
    def get(self, request):
        return Response('get 요청')
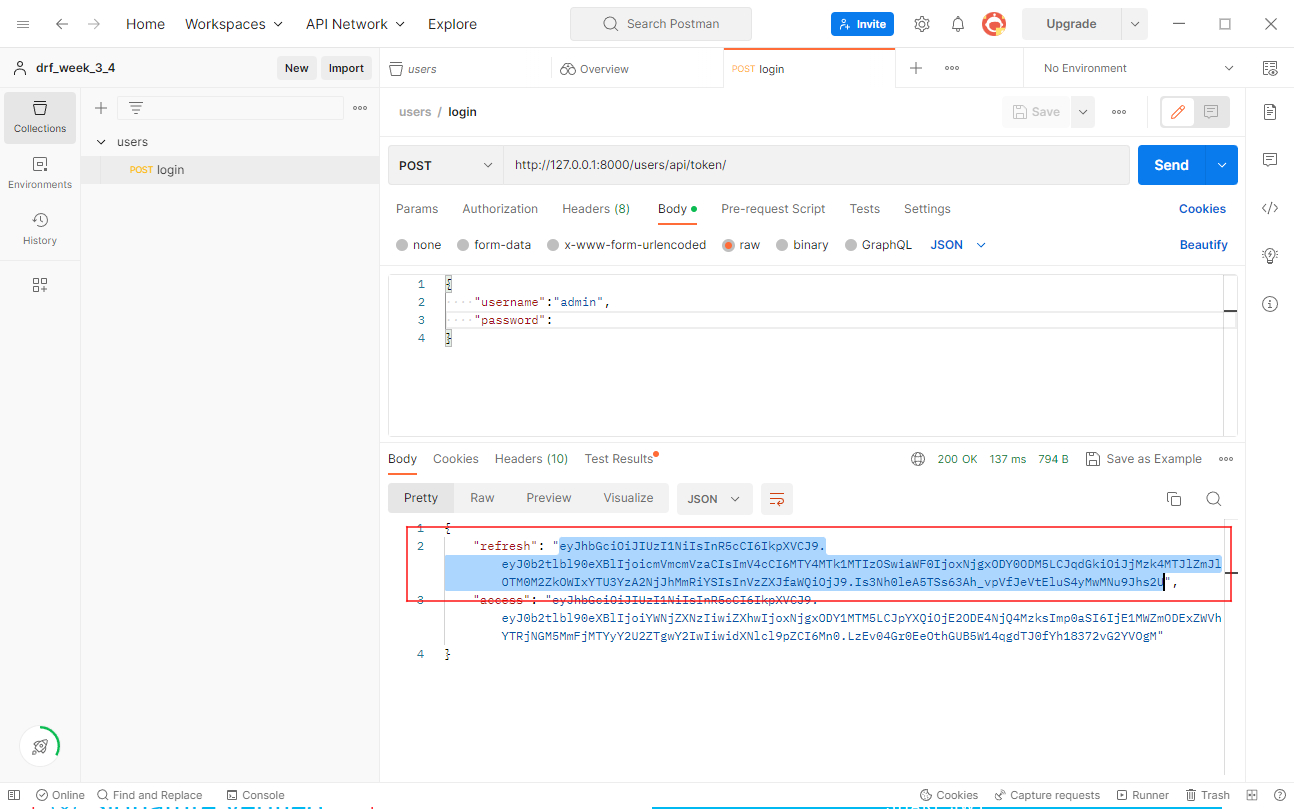
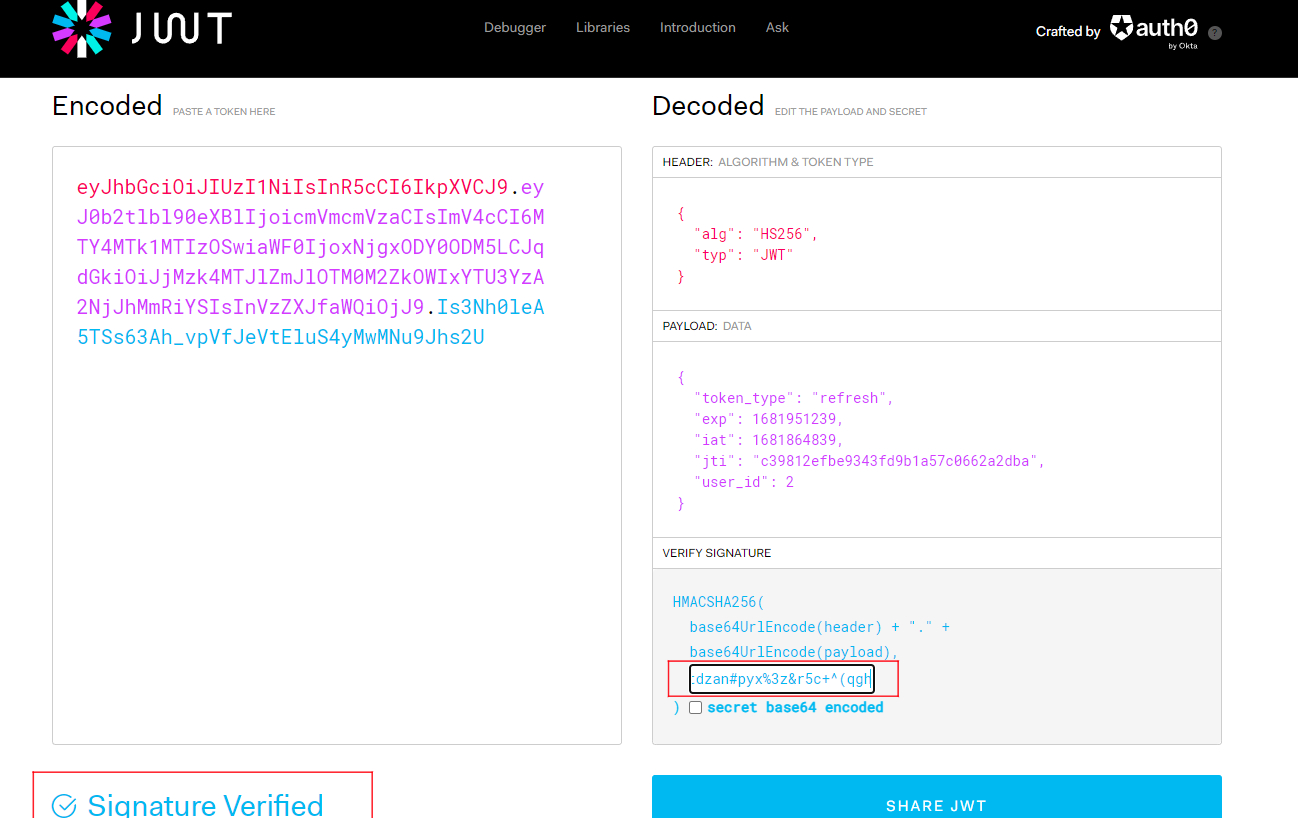
refresh 토큰으로 access 토큰 받기
Body에 refresh 토큰을 입력하면 access 토큰을 받을 수 있다.

'Python > Django' 카테고리의 다른 글
| [DRF] 10. 게시글 API (0) | 2023.04.26 |
|---|---|
| [DRF] 09. 스태틱, 미디어 폴더 세팅 (0) | 2023.04.26 |
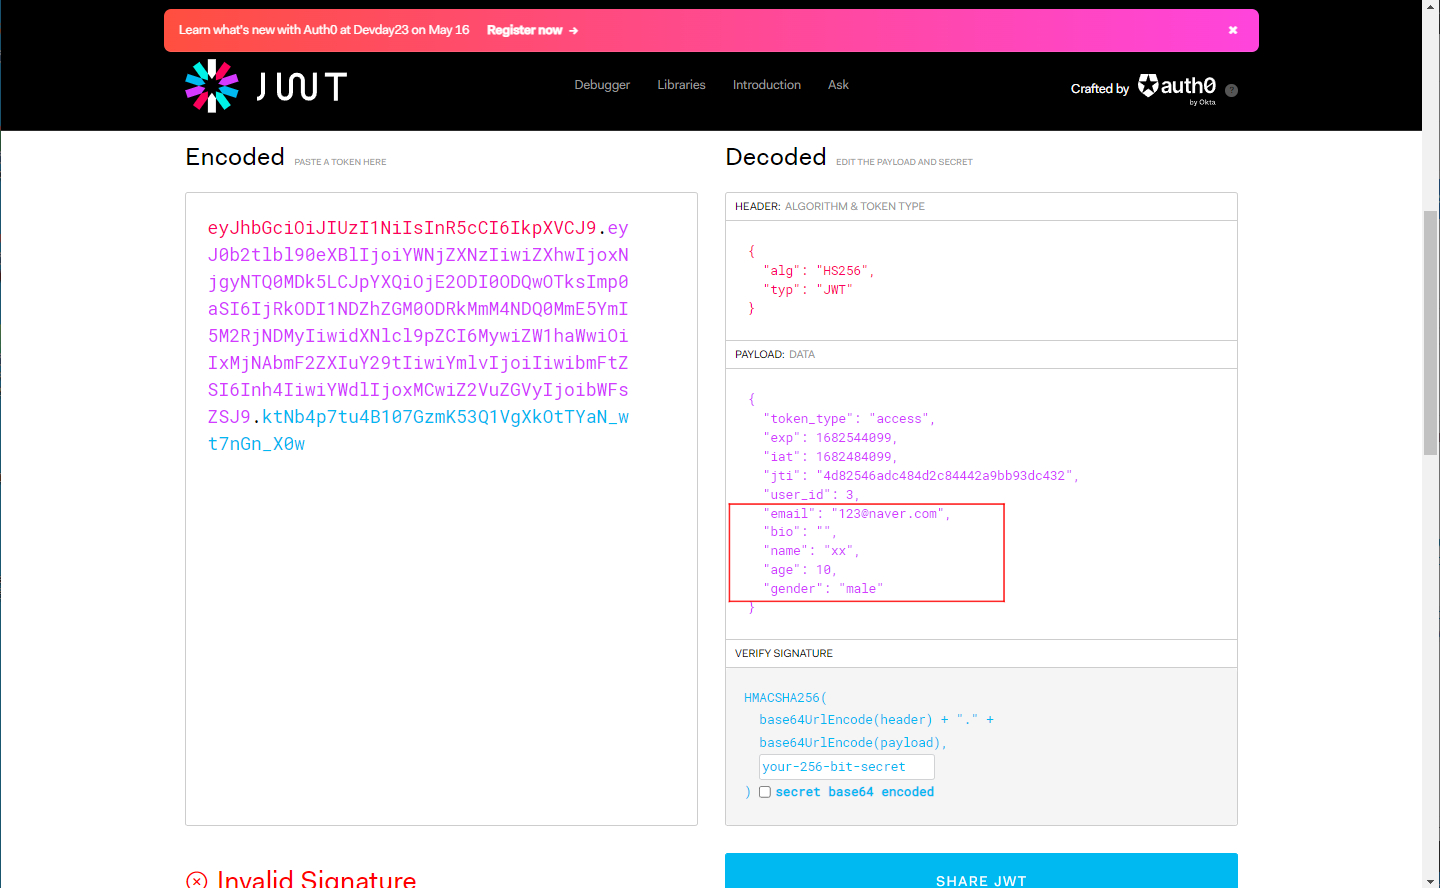
| [DRF] 08. Payload 커스텀 (0) | 2023.04.26 |
| [DRF] 07. 유저 API (0) | 2023.04.26 |
| [DRF] 06.5 admin 커스텀 (0) | 2023.04.25 |